-
What’s Up For the 2026 Season?
Just a few days away from starting the 2026 season, the seeds have all arrived, and we’ll be getting the greenhouse going a bit earlier than usual, for this is the first year we have our new Hoop House ready to go. It’s hard to imagine the “before times” now, even though a year ago there was no plastic on the new Hoop House, and it would take us until May 7th to finish it all and plant our first cucumbers and tomatoes.
So what’s coming up for this season? I figured I’ll go through a bunch of stuff I’m looking forward to, that I’m sure I’ll be writing more as the season progresses.- Seeding Tomatoes and Peppers for the Hoop House on March 1st. These will be transplanted in the Hoop House by April 15th at the latest, and we should be getting Cherry Tomatoes, Cucumbers and Green Peppers all in the month of June.
- Speaking of Tomatoes, I was so blown away by Cherry Tomato output last year that we’ll be relying on only 112 plants in the Hoop House to provide 100% of our Cherries for 2026, and I expect it to be a record year. The quality, consistency and flavour of the different varieties last season was phenomenal. We’ll be learning to “lower and lean” these as by August they should be around 20 feet in height.
- I just pulled the trigger on a new camera setup today, so I’m pretty excited about that, and I’m sure I’ll have lots to share about the life on the farm, from insects to birds and everything in between. The farm is beautiful and I want to share that aspect of what we do, and what we get to witness. There’s a lot of farmer content out there, and a lot of it is focused on explaining how to do stuff, and I’m pretty tired of all the “Productivity Bro Mindset” trying to optimize every aspect of farming. I don’t know about you all, but part of what I love about farming/gardening is being witness to all kinds of beauty that we get to see, and all the life that we allow through our actions. I’m not sure how to share it all but I’ll figure it out as I go.
- Parsnips. YES PARSNIPS. One last try. Oh how the Parsnips have almost defeated us. Well I’ve been able to find a different variety to try. At no small expense I’ve tracked down a fair quantity of an heirloom Parsnip known as Kral Russian, which is reportedly more like a beet than a carrot-type long root. Which should mean we can actually harvest them. Will it work?! Will they taste good?!? Will Parsnips defeat us again? How will this story arc end?! Tune in to find out, same Parsnip time, same Parsnip channel.
- Bringing the No-Till field up to 100% capacity for the first time. This will mean we’ll be running 58 beds of 100′ simultaneously. We were close last season, but now that some trials on onions, tomatoes, peppers and eggplants have panned out and provided some great proof of concept, we can go all the way. We’ve been trial-ing and mostly error-ing this system since we first started it in 2018. It’s taken us a long time to get here and I’m ready to feel some sense of accomplishment when all 58 beds are in play.
- Mushrooms. I’ve finally devised a way to make sure we get a permanent supply of Wine Caps. I don’t know what the yield will be like, but I’m looking forward to abandoning the labour-intensive and fail prone methods I was trying before.
- Late Season Productivity. With the first-season Hoop House learning curve out of the way, it’s a bit easier to see how we can leverage it for true season extension, and how that works in tandem with the permanent bed system. We should have a lot of stuff available post-Thanksgiving, and I expect the Hoop House to be outputting Lettuce, Spinach and Kale into December.
So there’s a few highlights, at least the ones I could think of right now. There’s a lot more, like cover crops, or finishing the orchard, or getting good at all those heirloom and specialty tomatoes.
Signing off today with a favourite photo of mine, a monarch instar, shot with my old trusty Canon Powershot S5 that I shall be retiring.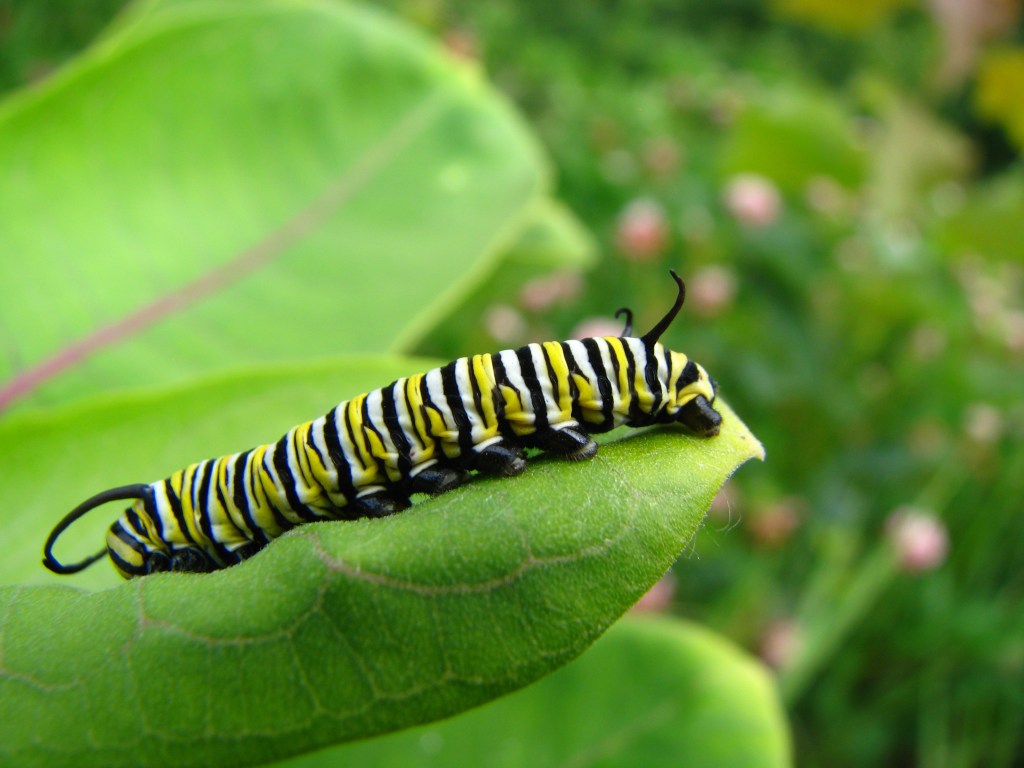
I’ll be hitting the greenhouse this weekend.
Spring is coming.
Graham
thanks for reading Complimentary Blueberry Juiceif you like this blog, please consider subscribing via email to get a post in your inbox every Wednesday, or sharing it with someone you think might enjoy it too
- Seeding Tomatoes and Peppers for the Hoop House on March 1st. These will be transplanted in the Hoop House by April 15th at the latest, and we should be getting Cherry Tomatoes, Cucumbers and Green Peppers all in the month of June.
-
Dispatch From the National Library of Finland
At no other time in the history of humanity have we had easier access to information than we do today. From the greatest thinkers of antiquity, to the diaries of Roman emperors, to the dizzying collections of letters and papers strewn about, to the vast numbers of scientific leaps that have changed the game so much, their authors attain household name status.
This is the National Library of Finland. When you walk into this library, you are required to check your coat and bags, there is no food or drinks allowed, and you can only bring with you a phone, laptop, or notebooks. In the first room you encounter, there is a collection of the most recognizable names across all subjects, volumes of their correspondence, and their work. The shelves are lined with the likes of Napoleon Bonaparte, Friedrich Engels, Rene Descartes, Isaac Newton, John Ruskin. It is a beautiful room with an astonishing gravity. Every author and figure is recognizeable, and every next section of shelf holds what feels like a never-ending amount of history. In another building lies the Special Collection Reading Room, where you can request to view rare and unique material. An archive is drilled into the Helsinki rock some 18 metres below.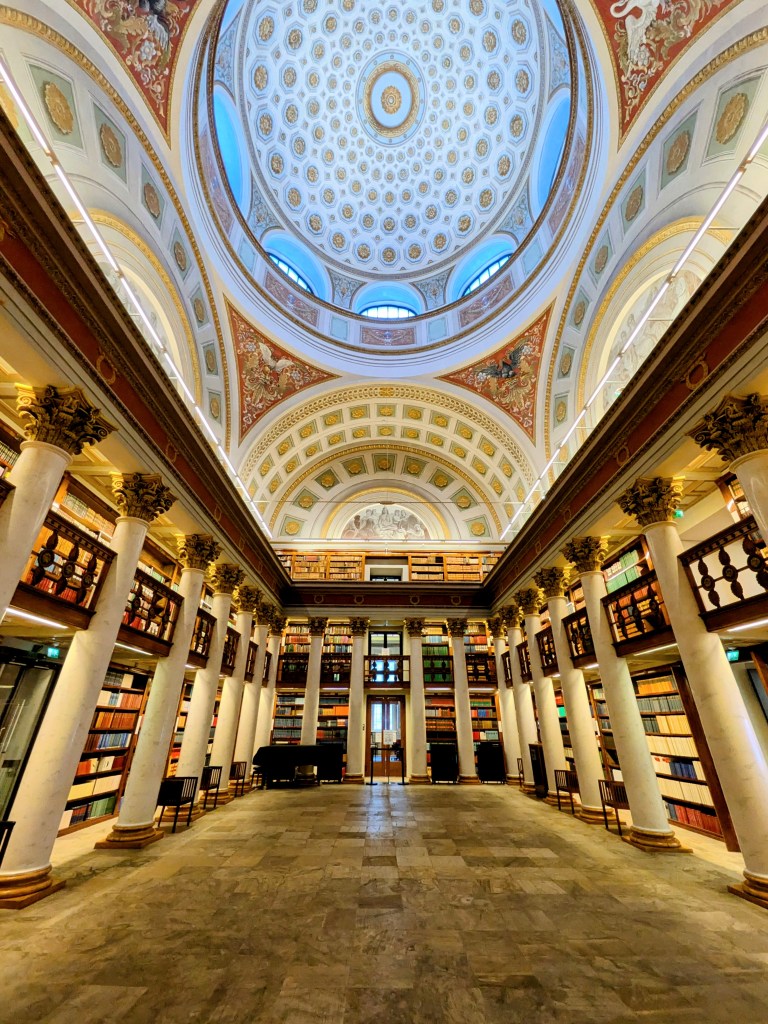
This feels like an odd place to be in the year 2026. It feels like an inoculant against the daily deluge of social media, AI slop, and algorithms controlled by billionaires. We are seemingly told daily by our tech overlords that a new wave of knowledge prosperity awaits us. The world pushes faster every day to realize this bizarre dream, where everything is done for us and all the answers just magically appear before us.

The people who wrote these volumes of correspondence and the works in this one room in this one library of course did so without the aids of computers. In many cases they worked on things that were completely unknown, and in many cases they worked wondering out loud why we do things, or what it all means. Their work, and the record of their work, stands as something richer and more meaningful.

I like being in these buildings because it feels like time slows down to the pace at which you can humanly absorb knowledge and allow it to saturate your brain. Even with all the access to everything ever, we are missing something. It is like we only get the highlight reel.
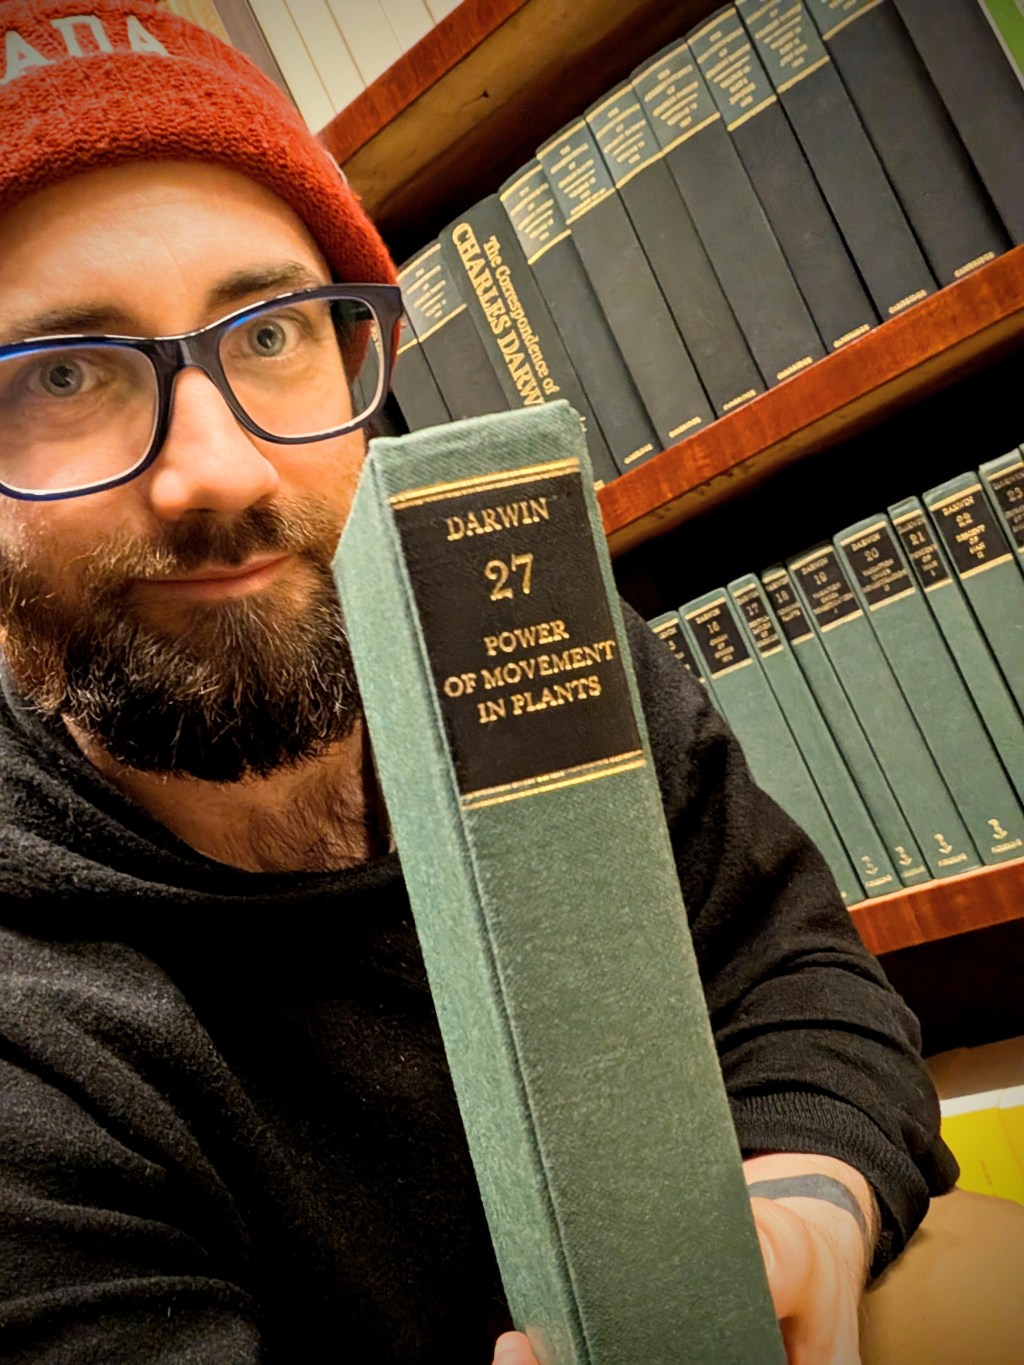
Did you know Charles Darwin wrote more than one book? Here they all are, in the National Library of Finland. Beside all of his correspondence, are all of Darwin’s other books and writings, in a 29-volume set published by William Pickering in 1989.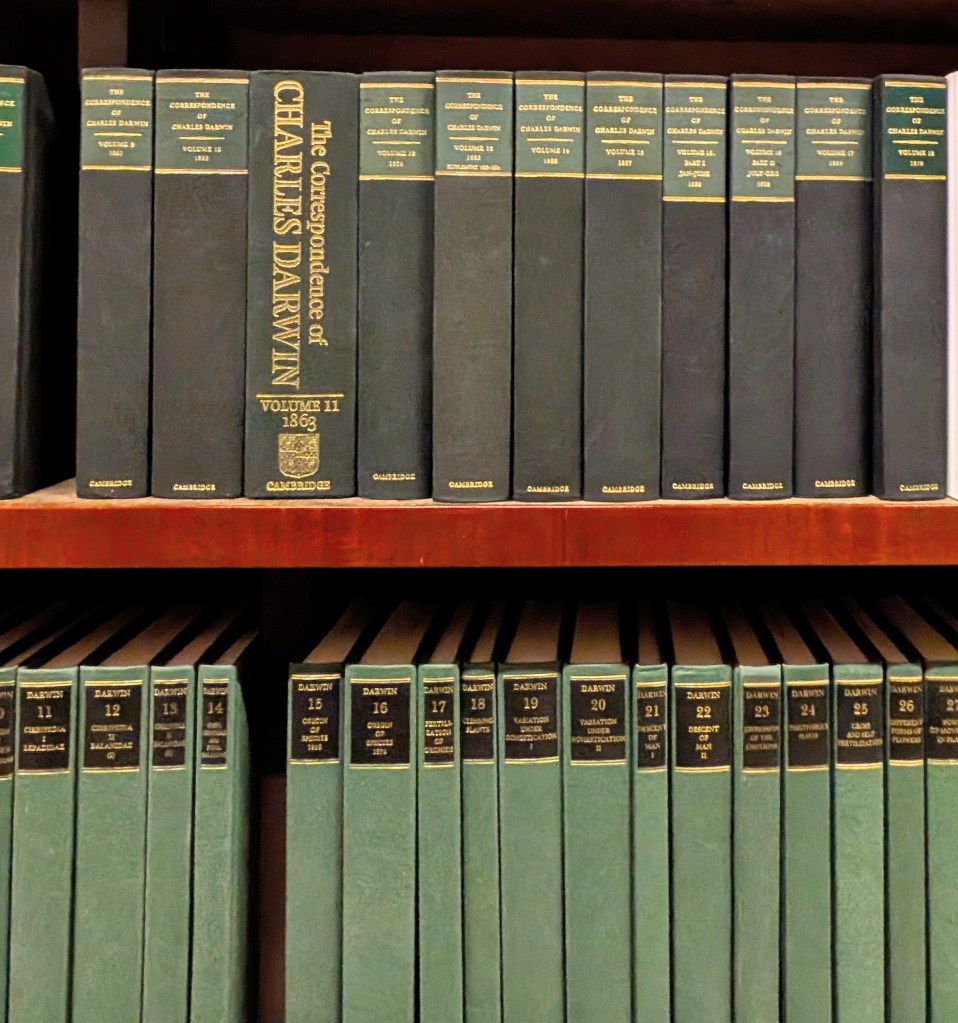
You might think it should be easy to find all of these in today’s world. But your local library may not have them. Or you may need to go to a university library, in which you may have to be a student to access. Type in Darwin’s name and you will sift through endless results of “On the Origin of Species” and the myriad biographies and deep dives into the man’s life (and no doubt some fiction too).
You might think it should be easy to find anything in today’s world but this is sometimes impossible. I cannot tell you how many times I’ve been paywalled by a scientific journal because I want to take a brief look at something esoteric (I’ll be honest though I usually use up my free articles on astrophysics). On the bright side, more and more papers are getting published as open access (RIP Aaron Swartz).
I have been searching more and more for “old thinking.” Darwin commented on plant intelligence, plant movement, plant genetics, worms and mold. There is something enticing to read something from somebody who pushed many boundaries of understanding, with little to go on. It is a different sort of thought process, curiosity. It is a different approach and worldview that leads one to seek, and a courage to write it down and share thoughts that may be correct or may be proven wrong.
In modern agriculture, what we experience is largely the result of an industrially applied methodology. It has been perfected, with the help of monied interests, and bought into by insecure farmers, desperate for someone to tell them the answer. We aren’t sure where the knowledge came from, we aren’t sure why we know these things, and instead of asking questions to learn more, often we just agree.
Over and over and over I see people surrender their own agency to learn things and reach a deeper understanding, or give into fear at the idea of trying something new or unorthodox. In a library like this you can read the thought processes of so many people who were clawing forward into the avant garde of domains of knowledge that today we take for granted.
We can learn more, and we can seek knowledge from people who have come before us. There is so much buried in the deluge of time, that someone, sometime, probably thought about it. Someone, somewhere, might have come up with a novel answer. And novel answers or ways of thinking have a funny way of staying hidden under the powers of industry.
But not in the library, where its all available, if you know where to look. Since you can’t take these particular books out of this particular library, I guess I’ll just have to stay here to read them.
Graham
thanks for reading Complimentary Blueberry Juice
if you like this blog, please consider subscribing via email to get a post in your inbox every Wednesday, or sharing it with someone you think might enjoy it too -
Documenting Biodiversity on the Farm
This summer I’m going to start a new project, documenting the biodiversity of what we have at the farm. I’m working towards doing it in such a way that I can share what I find with you. What that will look like exactly, I’m not sure. But I’m hoping to invest in some new gear to do it.
A lot of what I find is very tiny. For example, last fall I wrote this post detailing fascinating things I found collecting my worm compost. At the time I found snails that were perhaps 2-3 millimeters wide, and wished I had a macro photography setup ready to go….these things are just too small for a phone. I do have an older camera I got some 20 years ago specifically for an auto macro function, but it’s not in the best working condition anymore and not easy to use.
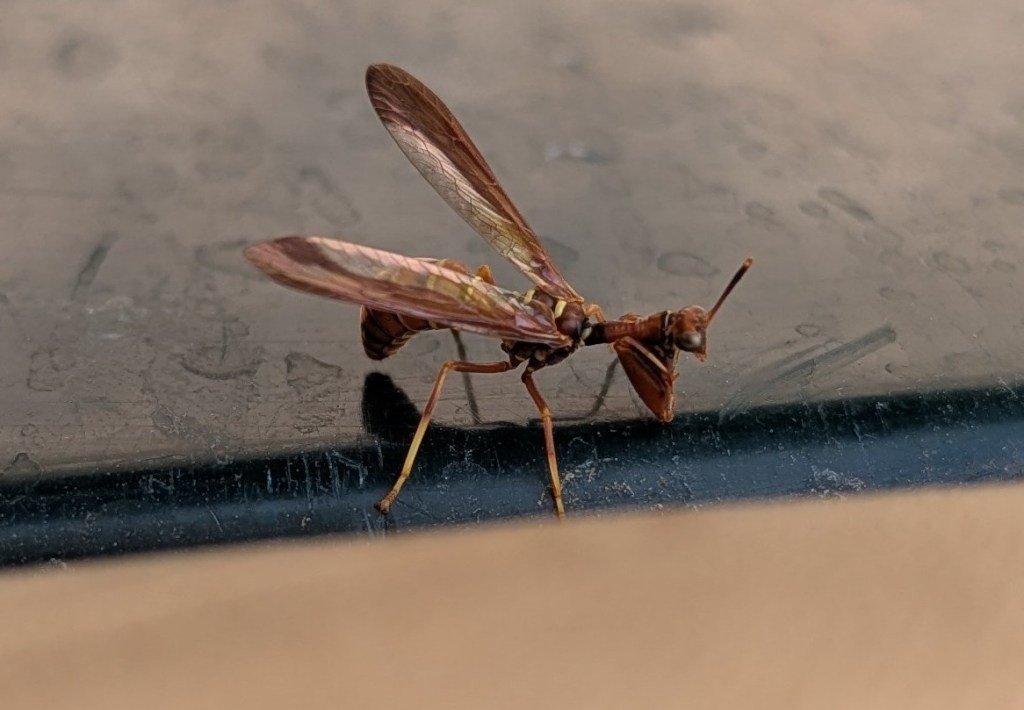
I come across things that are amazing and I’ve never seen before and wished I had such a setup to photograph and record it. Like this beauty, last season:This is Climaciella brunnea, or the Wasp Mantidfly. As it landed on the golf cart, I got a decent photo and uploaded it immediately to our Hnatiuk Gardens iNaturalist page where it suggested a match (iNaturalist and the community there is amazing for this). Every year without fail there is something I see in the field that just blows my mind.
The Wasp Mantidfly does not only have a striking convergent appearance to the praying mantis, they are not wasps at all, rather in the lacewing order. Their larvae attach themselves to wolf spiders and parasitically feed off of them.
…what?!?!
And there are so many wolf spiders in our no-till garden that I would hesitate to guess how many zeroes I have to add to get into the right ballpark of population magnitude. There’s tons of spiders because there’s tons of food and habitat for the spiders because it’s an acre of no-till garden that doesn’t receive any pesticides. So…there’s tons of “food” for the little Wasp Mantidfly larvae, and so after learning all this, it is not so surprising that I would see one eventually. Life goes where the food is. I’ll be on the lookout for the Wasp Mantidfly again this season.
The inter-connectivity of all things tiny is truly mind blowing, from fungus and plant roots existing symbiotically, to detritivore snails in compost, or lightning bugs that love to hide in lettuce for some reason. The world becomes the thriving place of life that is depicted on BBC nature documentaries, and it can be in our own backyards or gardens.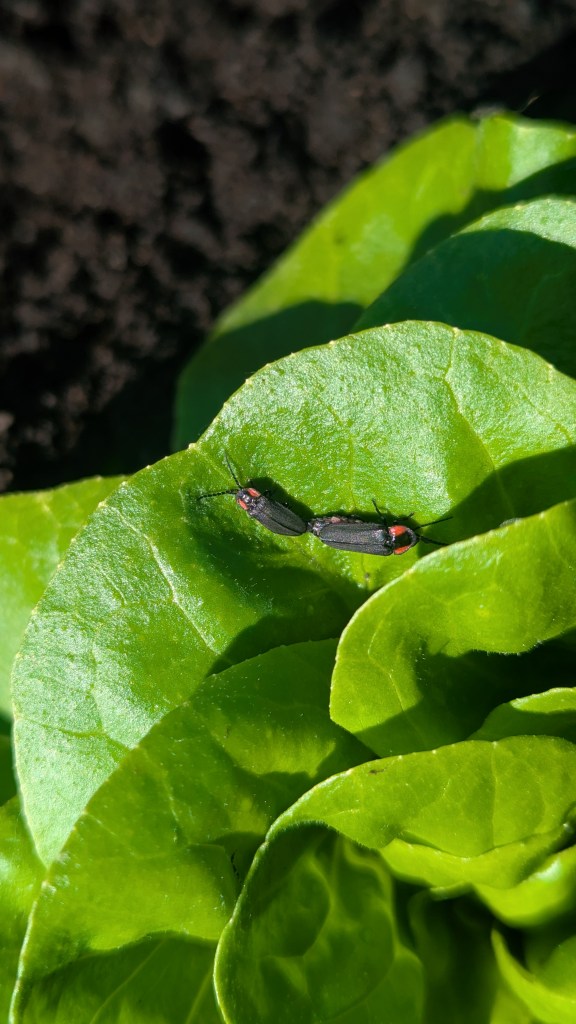
These are lightning bugs, related to the firefly, but do not make any bioluminescence. I have no idea what they’re doing in there, but what I do know is that they do absolutely nothing to the lettuce. I take seeing things like this as evidence of a healthy ecosystem, providing a home for things that are filling some niche in the complex web of life in the garden, and one that I am still not wise to.
What I’d like to do is get a camera setup that I can take pictures and maybe even video of these things with a lens just millimeters away. There is so much more out there that I come across that I would not doubt at all if I could document as much as 1000 species living on the farm property alone (now that I write that, it actually sounds like a good challenge).
These are the tiny things we miss when we destroy agricultural land and naturalized green spaces to build sterile parking lots for cars that we call “development” or “suburbs” in the name of “progress” or “growth.”
Life is beautiful, and we are a part of it. We separate ourselves from nature at greater peril each passing day. We must choose to do things differently.
Graham
thanks for reading complimentary blueberry juice
if you like this blog, please consider subscribing via email to get a post in your inbox every Wednesday, or sharing it with someone you think might enjoy it too -
Drafting the Season Schedule
I’ve finished my first draft seeding schedule for 2026, which is way ahead of my usual timeline for doing so. We’re aiming to go hard for early spring production, and I didn’t want the distraction of needing to complete this in March.
While this process has been streamlining itself and every year gets faster to complete it, this season was a bit of extra work, to re-analyze everything that was possible to get earlier and make adjustments.
The draft hit 301 line items, stretching from March to December.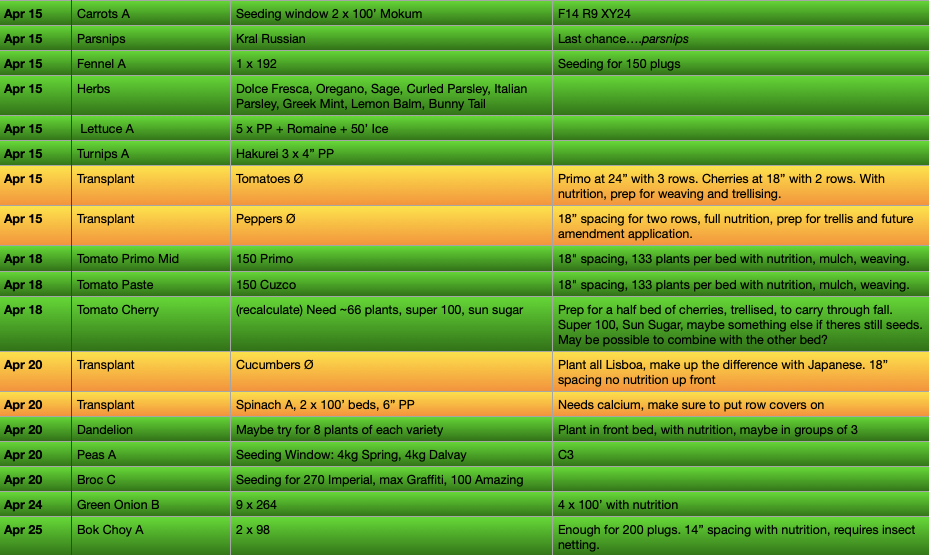
There are fancy programs out there that will just do this for you, but I don’t see the point in skipping the mental exercise that is evaluating the entire season before it starts happening and having a computer do it for you.
This sort of schedule is now tailor-made for our farm and what works best for us, I wouldn’t trade that to a paid application for anything. In re-analyzing everything from last season, I catch many mistakes, and use the schedule to make my notes as I go. By this time I forget all those on-the-fly decisions that we made last year. A lot of them worked, some of them didn’t.
The thing I learned most with this season’s analysis is that we seem to be really scared to plant things early. We’ve made mistakes planting early before…but those mistakes were usually things like..we were too lazy to put a row cover on something, and it went down to -2C. So we went with a later schedule, and ran into problems with hot dry conditions for cool weather plants. Now I think we have the experience and the incentive to just go for it.
Another place of big adjustments was the fall planting schedule. We tend to wait too long when the daylight hours keep shrinking, and we learned a lot with our new hoop house last season. We can both have a lot of stuff out in the field into October, and not rely on our hoop house too early. In other words, we can go for a really big season extension.
This whole thing will get one final edit before March, I’ll re-do the math, and double check I didn’t miss anything. Then it all goes on a clip board and we use it as a guide, changing the rest of what’s required on the fly, as per our farmer reflexes.
Graham
thanks for reading complimentary blueberry juice -
Our Little Orchard Story

***sorry to anyone trying to comment, it seems comments were held for review, but I’ve changed the settings so hopefully that doesn’t happen anymore***
About a year after we started the no-till experimental acre in 2018, I got the idea to start planting apple trees. I was pretty ‘green’ at the whole professional farming thing at the time but I just thought it was something we should have and I couldn’t really explain why.
It didn’t go very well, because all that happened for the first couple years was that I killed a whole bunch of trees. Due to my own negligence and complete lack of care. But I kept buying a few more trees and in 2020, I decided the location was awful (I would later find out I was correct) so I moved them to the back corner in the dappling shade of the most towering Oaks in the south tree line.By 2021 trees kept surviving (mostly), so I kept buying a few more to replace the ones that didn’t make it, and a few more, and by 2022 I had about 10 trees well on their way. I mulched the whole “orchard area” and protected my skinny fledgling whips with chicken wire in the winter to prevent deer from snacking on these precariously fragile sticks that I had wobbled my way through three or four years trying to get going.
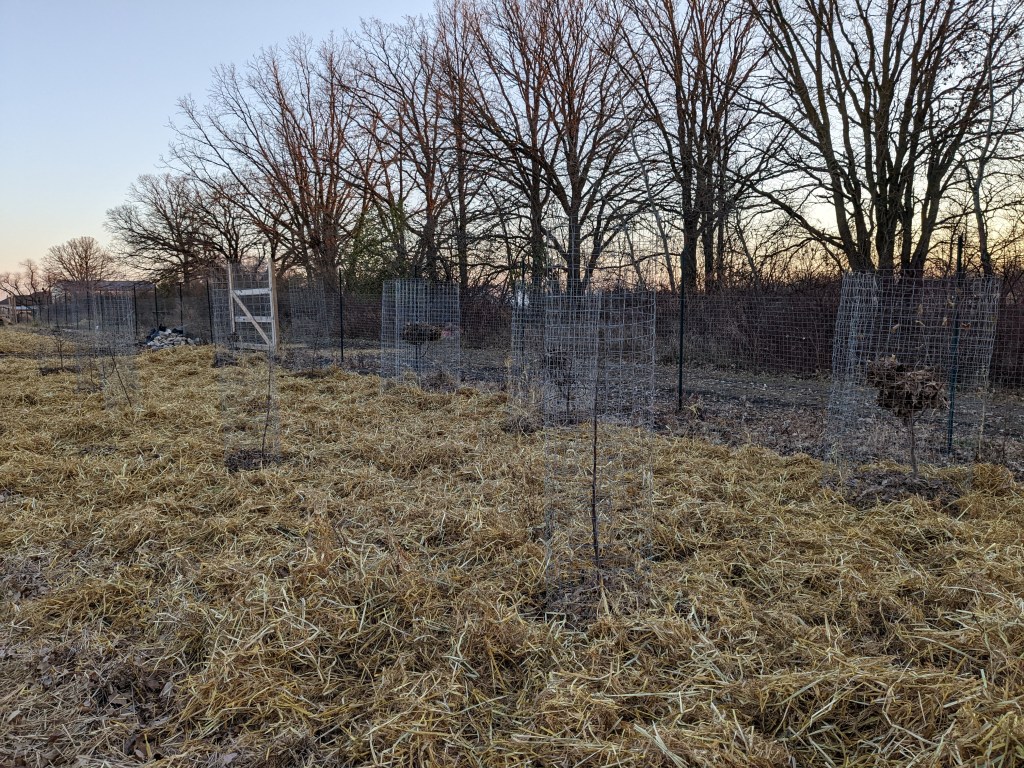
Unfortunately I have very little photo evidence of any of this (I checked) and its rather hard to take any sort of photo of a bunch of sticks that seems to mean anything. This is the first real photo I seem to have.
In spring of 2023 I decided a few of them needed their first pruning, so I boned up on YouTube and started cutting and shaping my trees hoping I wasn’t screwing this up. Because I let them grow wild for a few years some required some hard decisions on direction, and so some became single leaders, and some became open centres. I even got some Black Walnuts and Korean Pines to try out by the back fence line, where they would be well out of the way of any vegetables if they ever got big enough to yield anything.
The whole thing still seemed like it had no purpose, I was just growing some trees for fun, but I had grand ideas. Things like offering fruit to our CSA, or bringing to Market. But I thought of what passes for a typical Manitoba fruit, and I thought it must be possible to grow beautiful, incredible, sweet, unbelievably tasty fruit here. Beyond the bag of sour apples the neighbour donates for sauce. Zone 4 restrictions be damned. If only a tree could be well taken care of and its nutritional and ecological needs met, this should be possible, I thought.
Then something happened.
In 2024 I got my first beehive. I’d always wanted bees and now I had some. Another pet project for an ecologist. Standing there in springtime and discussing with my partner what we could do with this odd end of the field, what we were doing with a mess 30, 40 and 55′ no-till beds just to fill space? Isnt’ there something else we could do instead? The solution became the lightbulb: make all of it an orchard.
A five-thousand square foot orchard. Now it was obvious, and it was amazing that it never crossed my mind before, but how could it when I was busy killing apple trees? It was easy to imagine rows of fruit, and just enough of each different kind of fruit for our community. The more imagining I did, the more I realized just how flush with fruit I would eventually be, that I might not know what to do with it all.
But I’ll cross that apple branch if I ever come to it.
First went in the plums, but they didn’t do so great, and neither did the warranty replacement trees, and I lost a full season and had to switch suppliers. But the row of Cherries took more easily, and all of a sudden there were what appeared to be four rows of trees.
By 2025 I was researching more about trees than I ever had, purchasing TM Dejong’s Concepts for Understanding Fruit Trees, an academic review of fruit tree physiology that helped me fill in my gaps of tree biology understanding. I was, and still am certain, that the path to walk is the nutritional one, accompanied with a healthy local ecosystem, to grow mind-blowing fruit in the challenging Zone 4. This book got me thinking about how to help the trees along through the entire season, and how each branch holds its own nutrient reserves.
More fruit trees went in, I ordered Pears and Grapes, the orchard now stretching across the width of the property, with my dead warranty Plums being the only missing teeth.
But 2025 was the season that I finally got to taste those first apples.
It’s been 6 seasons for this struggling little Norkent. Pruned to open centre. It’s my best tree. She’s setting fruit out, so I go each day, knowing from the book that the window to affect resource allocation and fruit size is very tiny. I prune all fruit sets down to a single fruit per set, over 100 tiny blueberry-size apples off the tree. I water the tree. I give the tree additional Calcium and Sulphur. I give it foliar applications of compost extract plus a little calcium and trace elements every two weeks.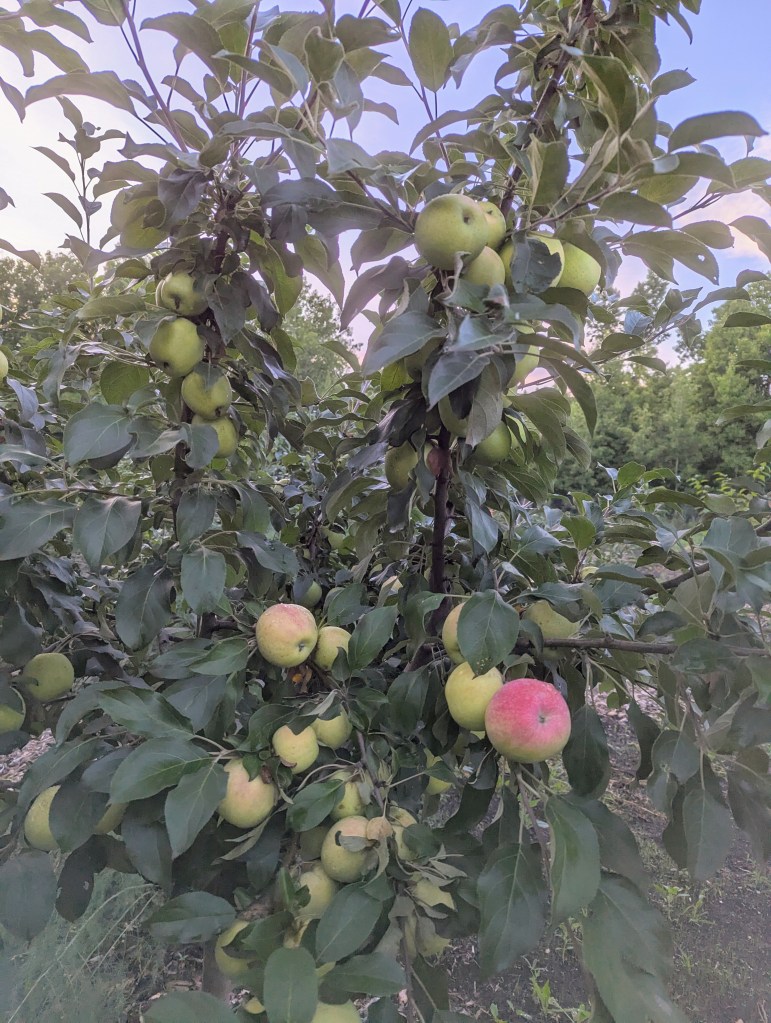
Nearly every time I go by the tree I stop to take another look and marvel at this magic. After waiting all this time, after being so patient, my Norkent was loaded with beautiful fruit. Some of them were even as big as an apple you’d find in the store from BC.
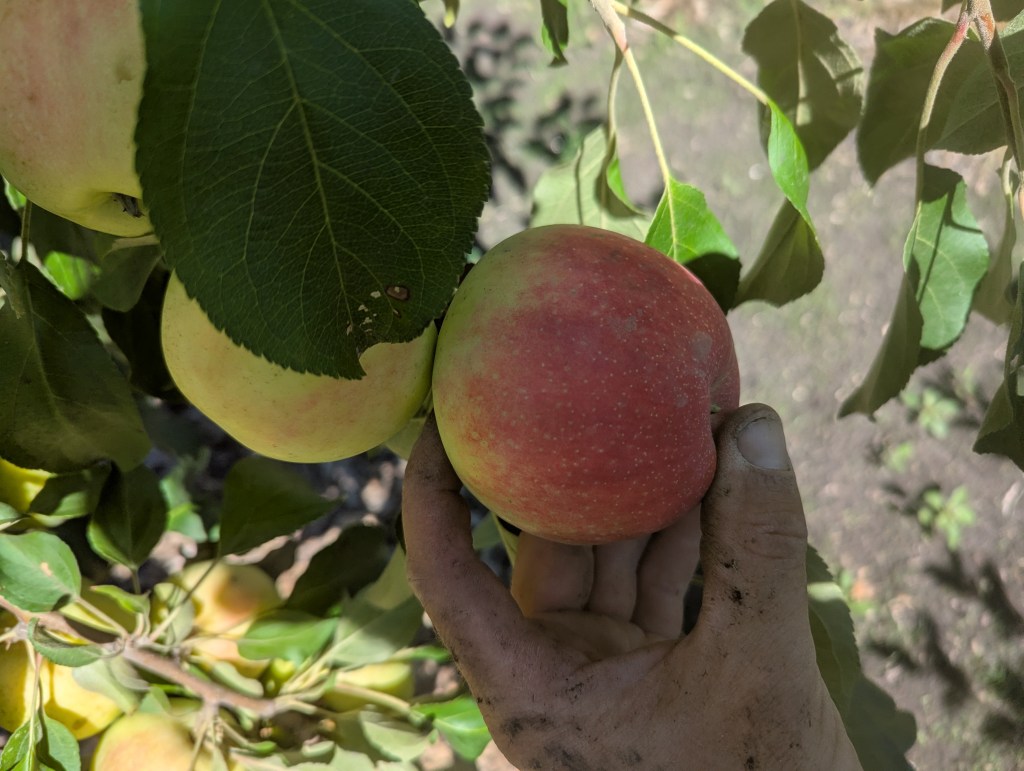
When it finally came time to harvest, I couldn’t believe the results. Crisp, sweet, crunchy, a beautiful hint of that Norkent pear flavour, finishing with a light tartness. This was the apple I’d waited for for years. And it was delicious. There was 0% insect damage with no pesticide or chemical applications, only nutrients. Several dozens of apples went into a crate, and I ate them slowly over the next few months, finishing the last of them in November.
But the work didn’t stop after picking. No, I had to make sure those branches were loaded up with resources for next season. So I kept up my foliar application regime right until leaf senescence. The leaves were themselves huge and beautiful. When they fell they revealed the gorgeous skeletons lying dormant for next season. When they fell, they revealed how much they had grown. One tree had set more than a metre of new growth in just this one year.More goes on than meets the eye.
After a big rainstorm, mushrooms pop up everywhere in my newly germinating multi-species perennial orchard ground cover. There can be no other source of the abundant and mysterious mushrooms…but the wisened Oaks and of the treeline and the forest at the end of the field. There is a massive mycorrhizal network underneath my feet the whole time. Of course there is. I have no doubt it is helping these apple trees in some invisible way, and that it will spread through my entire orchard.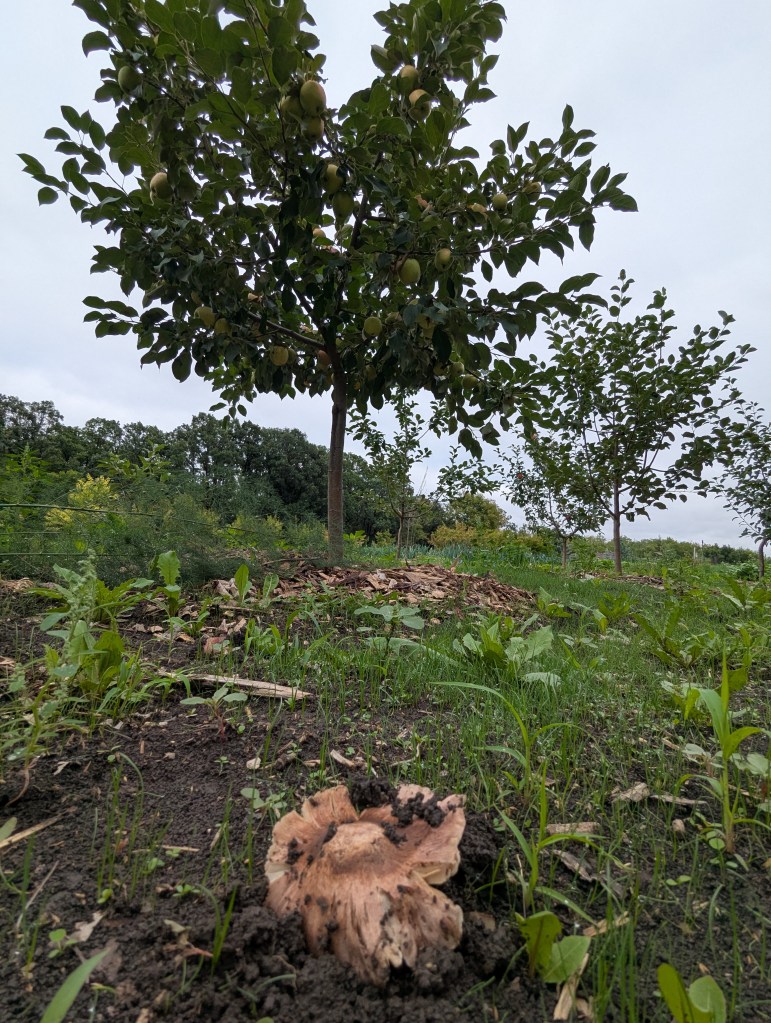
Whether or not they are intertwining themselves with my apple trees, I don’t know, but they are the greatest evidence that these trees are in the correct location.
I expect 3 or 4 apple trees to fruit in 2026, and I am a little scared to think that it may only be a couple years before I am awash in 1000 delicious Norkent apples from just a couple trees. It won’t be long until I have to get people to help me eat them all.
This 2026 season I have replacement Plums on the way, as well as a couple filler apples, and another Pear. I hope my Zone 3 and Zone 4 grapes have survived the recent cold -40C.
Little did I know that this insistence of planting apple trees of mine would turn into a whole thing. To me, The Orchard Project is now the most exciting thing going on at the entire farm, in our experimental one acre of no-till. It’s my own little pet experiment, one that makes absolutely zero business sense, and makes absolutely no money but has cost me plenty.
I can’t help but love watching the slow progression of these incredible organisms, it WOWs me every year. It plugs in everything I’ve learned about biology, ecology, farming, fertilizing, watering, diversity of species, and healthy ecosystems, and now is a new experimental area for timely foliar nutrient applications on perennials. It’s my little sandbox, with bees buzzing around the clovers and mushrooms springing up from the forest. I know that one day I’ll be able to sit underneath a crown of trees in the shade.
Planting trees feels like an act of resistance. Against the stupidity of human affairs. A defiant source of hope. There is so much joy in watching a tree grow, doing its thing, slowly, year in, year out.
There is so much joy in learning a skill I don’t have, but nature is going to give me a big assist on this one. She let just enough of my trees survive so I wouldn’t give up.
Grahamthanks for reading complimentary blueberry juice
-
Book Recommendation: White Light
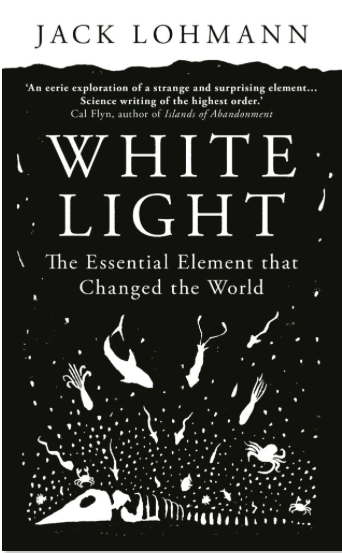
I highly recommend White Light: The Essential Element that Changed the World, a book about Phosphorous, by Jack Lohmann. Published just last year in 2025, the book details the Phosphorous cycle and its crucial role in life on Earth, its discovery as an agricultural fertilizer, and the severe environmental and political implications of mining it. It also has a super awesome book cover that I would gladly have as wall art (or at least the one I have did).
For Lohmann’s first book, he does an amazing job explaining stuff and taking the reader on the journey. Even as a reader who knows a lot about science topics in general, I found the narration here very good. For anyone who knows nothing of the topics, you’ll also find it easy to follow along, as Lohmann doesn’t drag things down into academia.
There’s also a lot of rather shocking stuff in here, politically speaking, that is very well placed. Anytime Florida is involved with agricultural disasters you’re in for a good eye-opening and jaw-dropping ride.
I certainly learned a lot from this well-researched and well-footnoted book, and I also like that there was an editorial choice of sorts not to bog the writing down with citations. The footnotes are simply listed in the back, which made for some good source mining.
The best quality of the book is that the author takes a more meta-level approach to it all, I mean to say the totality of the life cycles on the planet, the geology, the way phosphorous is woven into billions of years of evolution, and how it shapes things and makes or breaks things. I often feel like these realities are lost on us puny humans, especially in these times of never-ending information bombardment, growth at all costs, consuming the environment for our own silly and selfish short-term interests.
I hope Lohmann has some more science-type books in development, but in the meantime, this one is a banger.
Graham
thanks for reading Complimentary Blueberry Juice -
Pushing for Spring Production
New year, new season, new schedule. As I always like to say, this is the best time of year for farming…because nothing has gone wrong yet. It’s all the purity of the platonic farming season, where everything grows perfectly, everything goes to plan, harvests are abundant, and perhaps most importantly, there are no weeds.
I’m working on analyzing last year’s season and all the data and photographs of our best successes and worst disasters. That is my typical off-season work project. But for this upcoming season, there will be a new challenge: pushing the limits for what we can get early, by up to three weeks.
Historically we’ve been pretty bad at this part. We try for early stuff and then it doesn’t work out for any number of reasons. Wisdom is not in the accumulation of experience but in knowing when to deploy the lessons from said experiences. Done successfully this is what is known as the so-called “green thumb.”
So I made a calculated bet that I could go for it. Yes, I’ve frozen my spinach seedlings because I thought they could survive -2C with no cover. Yes, I’ve lost spring sown crops to weeds. Yes, I’ve stuck stuff out in the field and dry farmed, I suppose, expecting they could magically find themselves water. We tried many “early” varieties with eyebrow-raising-low days to maturity, only to find out that the end result vegetable was small and underwhelming.
Despite all these farmer fails (and many, many, many, many more) over the years we defaulted to playing it more…safe. And we had no driver for requiring ourselves to get stuff early. We placed our CSA program into the back half of June when we knew we would likely have enough product for everyone. So we also favoured varieties that we knew were solid, they would just take some more time. The strategies we put into place made sure by end of June, and early July, we were flush with stuff.
So no better place to begin challenging oneself than with the same CSA program. This year I put ourselves on the hook for a two-week-earlier experimental pilot program, without even having any real idea of what it would look like, or what we could offer.
Now begins the exciting part, experimentation. I’ll be honest, I get downright bored if I am not experimenting. I need it. Part of the privilege of running a farm is getting to do exactly that. Part of it to is the knowledge that all these trials, many will surely fail, and some will succeed, but most importantly, there will be many surprises. And I like to use experiments to leverage those surprising results for future plans. You always learn something. And if you’re not actively trying to get into the failure zone, you might still learn, but definitely not at a fast rate.
The challenge that will be enjoyable now is looking at every vegetable, and asking is there some way I can get this earlier. For sure. Of course there is. Is there some method I’ve just not bothered considering so I wrote off the possibility of getting this crop early? For sure. Of course. Have I just been lazy, and could have covered something or watered something and succeeded? Be honest. For sure. Of course.
With the finalization of the new hoop house and quite a bit of no-till infrastructure, there is a lot less for us to do up front on the farm in the springtime this season. These infrastructure projects sucked a lot of valuable time and energy out from other things. With these projects in the 95% finished zone, we have a lot more energy to devote to what we should be focused on in April and May: growing stuff. As much as we can. As early as we can.
So we begin the new journey of 2026.
Graham
thanks for reading complimentary blueberry juice -
Looking For Your Suggestions and Comments!
I published the first complimentary blueberry juice on January 15 2023, so in a short while I’ll be starting the 4th year of this writing experiment. I do enjoy doing this, just having a space to engage in the process of writing and offload whichever problems I’m working through, or compiling some photos. I don’t plan my posts and just try and make a point to publish every Wednesday.
But for this inaugural 2026 post I’d like to ask my readers for suggestions or comments. It could be a topic you’d like to see, or something you’d like to hear more about. It could be what you like about what I write here, or some question you have that you’d like me to answer. Leave a comment down below or feel free to email me.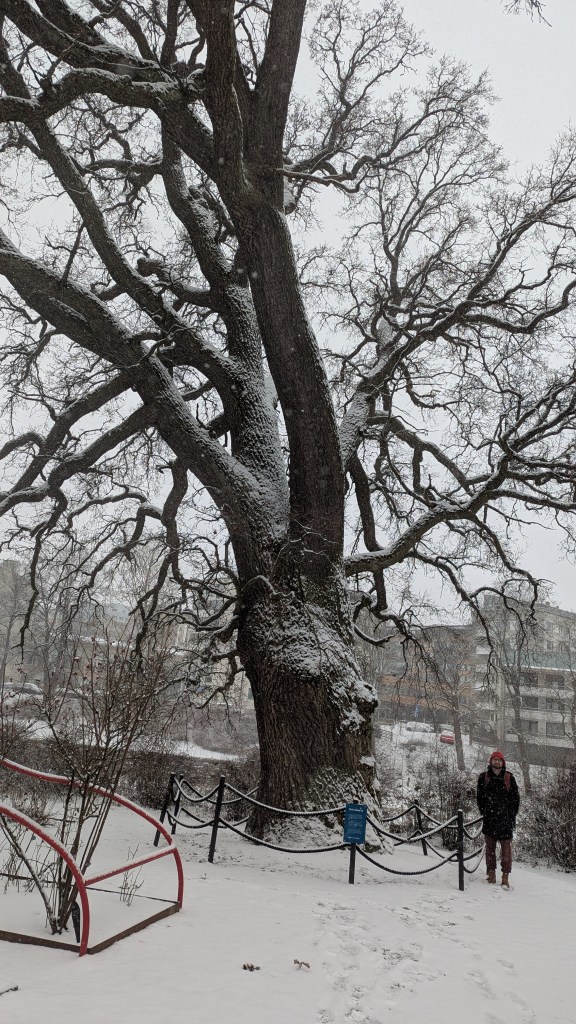
Me beside the Pehr Kalm Elm Tree in Tukru, Finland, planted in approx 1750 as part of a botanical garden with over 300 specimens. The tree is potentially one of Turku’s oldest, as it survived the catastrophic Turku fire of 1827.
I’ve read a number of great books recently, I could write about those as well, and as I sit here about to tackle analyzing last season’s data and preparing this year’s schedule, there’s a lot of photos that I could pull and write about for probably a few months.
For a few years I’ve thought to make a YouTube channel, in the same sort of spirit as this website, just uploading stuff once a week, with no real plan in mind. Surely I don’t intend to go all “content creator” and “influencer” but rather just share what is happening in the garden and the things that interest me. I don’t know that I really want to do this, but it does cross my mind from time to time.
Lastly on the more philosophical, winter is a time for reflection, and there’s a lot to be said about mindset when it comes to farming or gardening, how these ideas can impact positively or negatively, how they affect a business, and finding the right ideas and philosophies that work for you in pursuit of this challenging work. These are interwoven with the philosophies and ideas of life itself, the human-centric viewpoint on plants, what role the farmer or gardener has in relation to all of it, and the decisions we make while we interact with the living things that surround us.
I hope we all have a great 2026!
Graham
thanks for reading complimentary blueberry juice -
Beautiful Rhizosheaths
After quadrupling our cover crop area this year and changing a few operating procedures, it was super exciting to leave those cover crops digesting in the last weeks of fall (more on the cover crops and treatment this season here).
However the cover crop story for this season didn’t stop there. Yes they were shredded and incorporated with compost extract, calcium and a biological stimulant. But the weather remained mild through September and October, and wouldn’t you know, at least some species of the cover crop….started growing back.
This was super wonderful as it meant those fields were still actively cycling nutrients, and there was still some small amount photosynthetic energy being directed into the ground. It also meant that we maintained a good ground cover.
I don’t know why I didn’t get a better photo of this, at least till we got the first snow of the season in early November. That’s the re-growing cover under the white stuff.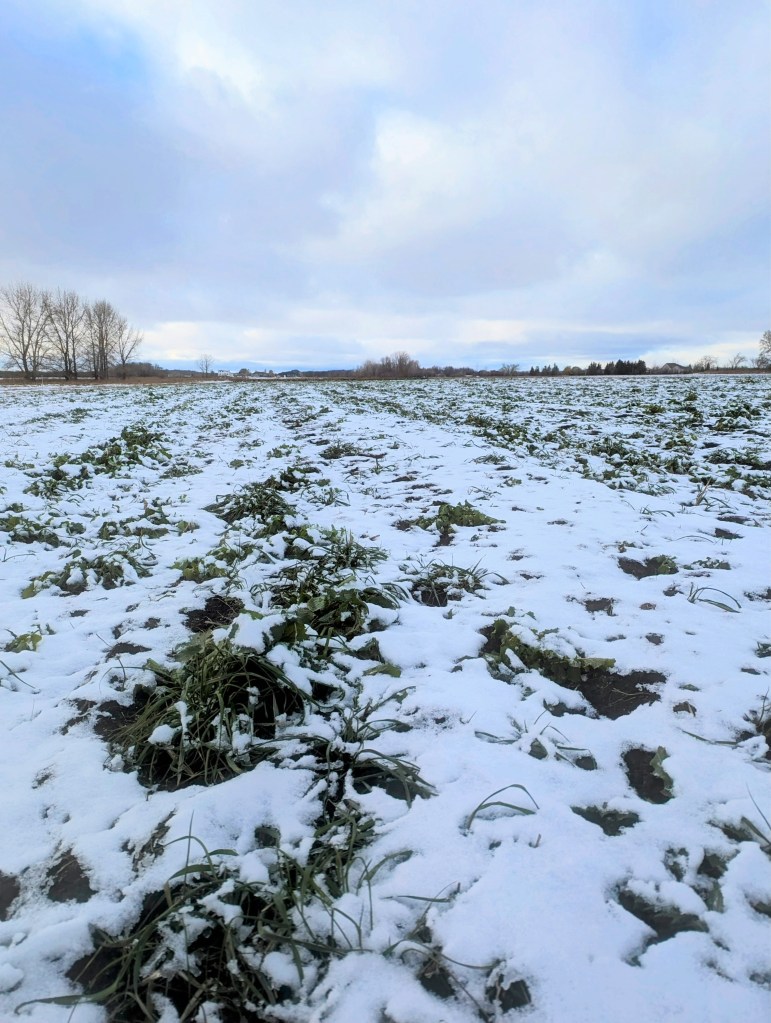
So it would seem we got the best of both worlds here. We got what was intended: a micriobiolgy-driven decomposition in the top layer of soil following incorporation, breaking down that nitrogen, phosphorous, calcium and etc and holding it in the soil.
The bonus was that we also had some low amount of photosynthesis still happening, living plants putting some amount of carbon into the soil, and hopefully developing symbiotic relationships with the aforementioned microbiology.
Well, I did get photo evidence of that on October 25th on what I think is an Italian Rye.
This is a rhizosheath.
A rhizosheath is a zone of microbial activity around the plant…what appears to be dirt clinging to the roots here, which cannot be shaken off, is conglomerations of soil and microorganisms growing on the fine root hairs of the plant, which are secreting carbon-based goodies into the ground in what is known as “mucilage.” In this way, the plant can cultivate an interface with the life of the soil directly surrounding the roots.
I wasn’t expecting to find this when I yanked it up, but there it was. A healthy plant doing healthy plant things, right under my feet.
To be clear, I have pulled many a weed and many a plant over the years that do not have this feature. It was exciting to see.
I’d like to think that it was the cover crop process and biological amendments that lead me to this point, but the real proof will be next spring when we plant here. This was the goal: to create a biologically rich soil for next year’s crops to plug into and receive the benefits from.
Cool stuff.
Graham
thanks for reading Complimentary Blueberry Juice -
All The Life In The Compost Bin
Last year I was able to successfully harvest 600L of worm compost and repeat that this season. It worked pretty well, and if you want to read about why we’re running our waste ProMix through a worm bin you can read that post here, and on the second go-round I tried to make some improvements with what was added to the bin, and had some surprises along the way (…snails?!)
The main protagonist here is worms, which are the only intentional organisms in the bin, but the goal with the worm bin is to foster as much life as possible in the decomposition process. That should give us the widest possible array of life, and result in the widest possible array of both macro and trace elements in a biological form ready for uptake and integration by our seedlings via the invaluable decomposition process.
To accomplish this, I take it upon myself to add random extra stuff as habitat, using the “if you build it they will come” strategy. In an ecological framework, there are unknowable amounts of life happening to break things down, and recycle organic material. This means that strategically, we can add different groupings of things to the bin to target general groups of decomposers.
Some examples here are:
1. Leaves: which act as carbon-rich bedding substrate for the worms and are chock full of all sorts of trace elements wise old trees procure with their extensive symbiotic relationships. Leaves last a fairly long time in the bin and attract various molds.
2. Sticks/Branches: Being made of cellulose and lignin, these complex carbon-based polymers give wood their strength and as such take a long time to decay. They can provide a house for various fungi that slowly release this carbon into our finished soil mix. They last years and years in the bin and also retain moisture, which means we can always maintain a good fungal population, and who knows what else is slowly eating that wood.
3. Vegetable waste. These are going to break down quickly as they are mostly made of water, and attract a range of bacterias, and need to be continuously added through the season.
Those are our invisible allies in this game, but the worm bin supports an enormous tree of life. There are all sorts of arthropods and insects scurrying about the bin, consuming things and cycling nutrients. The most visible of this macro group of decomposers in the bin are isopods, our friends the sow bugs. But there are tons more if you look closely, the substrate in the bin comes alive. These bugs secrete their own enzymes that break down plant material.
There is an interesting paper on the often-overlooked effects of invertebrate decomposers on plants and soil here.
Also in the bin is a predator class, spiders and centipedes. All these insects additionally molt their shells as they grow from instar to instar, chitin being another complex carbon polymer that gets broken down in the bin, and additionally they all harbour their own nutrient packages, full of stuff that gets further recycled when these insects themselves die.
It’s really satisfying to see the amount of life in the bin at this point, and that this rich substrate that is getting broken down over and over is of enormous benefit to our future greenhouse seedlings. So…mission accomplished.
And now for a bunch of photos on what this all looks like in practice, though maybe in the future I will be patient enough with my macro lens to capture all the tiny life.
First, the glamorous bin itself, 8 feet by two feet, situated between our two greenhouses where it stays out of direct sun and is easy to access. Now to get enough of this stuff out to fill the 600L overwintering bin, which will stay at about 5C for the winter.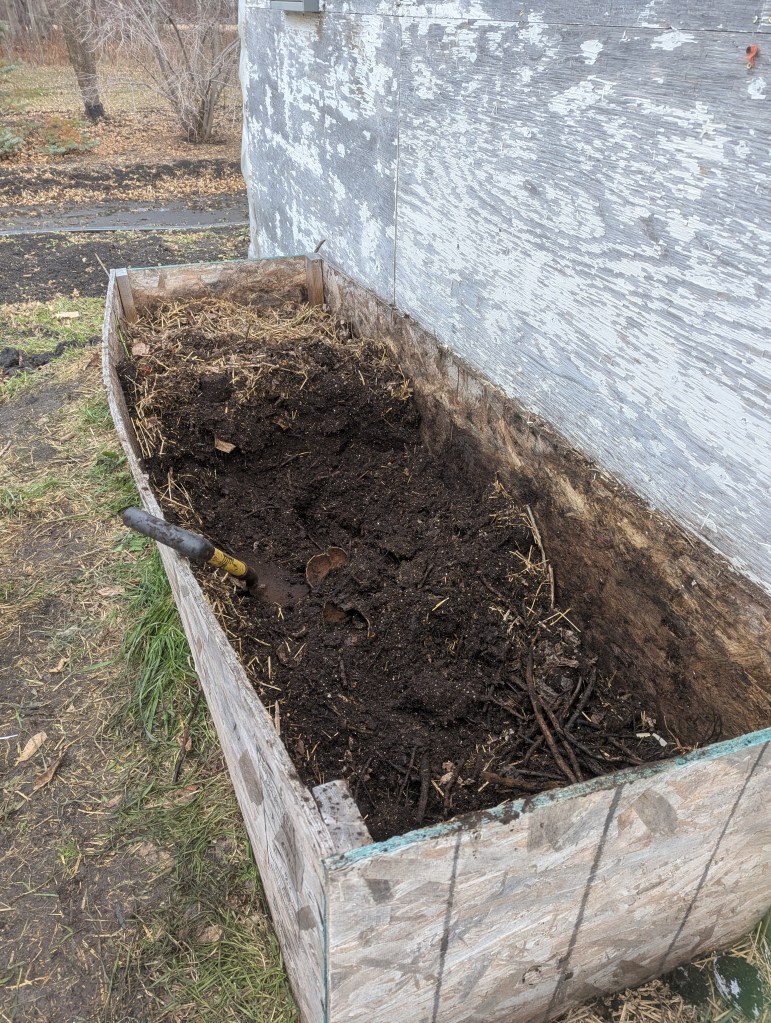
Next was a big surprise…snails! I guess I threw some kale stems in there at some point (I don’t remember, I do a lot of this on a whim when odd materials become available). After all, who knows what decomposition benefits or habitats various materials will provide.
I noticed they were hollow inside when I picked them up. When I broke them apart, I expected to find sow bugs (I did) and had my mind blown. They were full of snails. How did they get there? What species are they? I have absolutely no clue. I don’t live in a place known for snails that do not live in water. All I know is they are eating away at that kale stem and turning it into good stuff. Their shells will also be full of calcium, which is also always my #1 priority nutrient.
Every kale stalk I broke apart had dozens of them. Fascinating!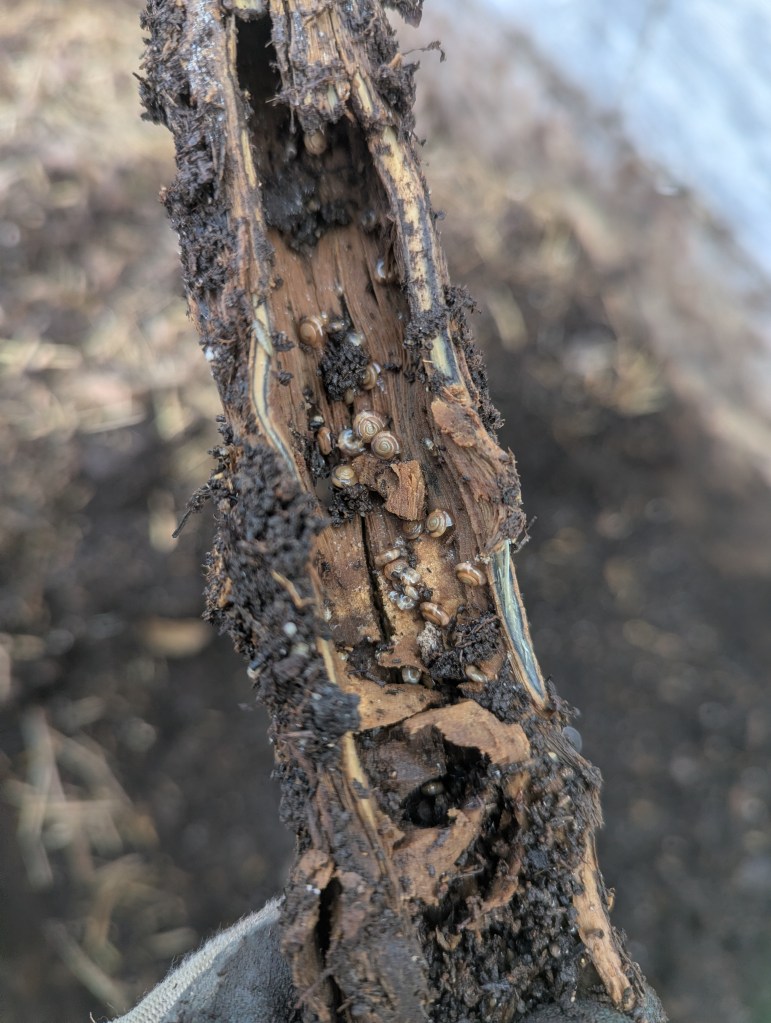
This year, I didn’t do so great on my overwintering worm husbandry. I actually ended up purchasing worm reinforcements by midsummer. They overwintered well enough, but I didn’t do my job after that part.
Here’s the 600L bin filling up, but I didn’t pre-sift it this year, opting to leave more intact chunks of stuff in there as continued food sources. I’ll sift it next spring as I go.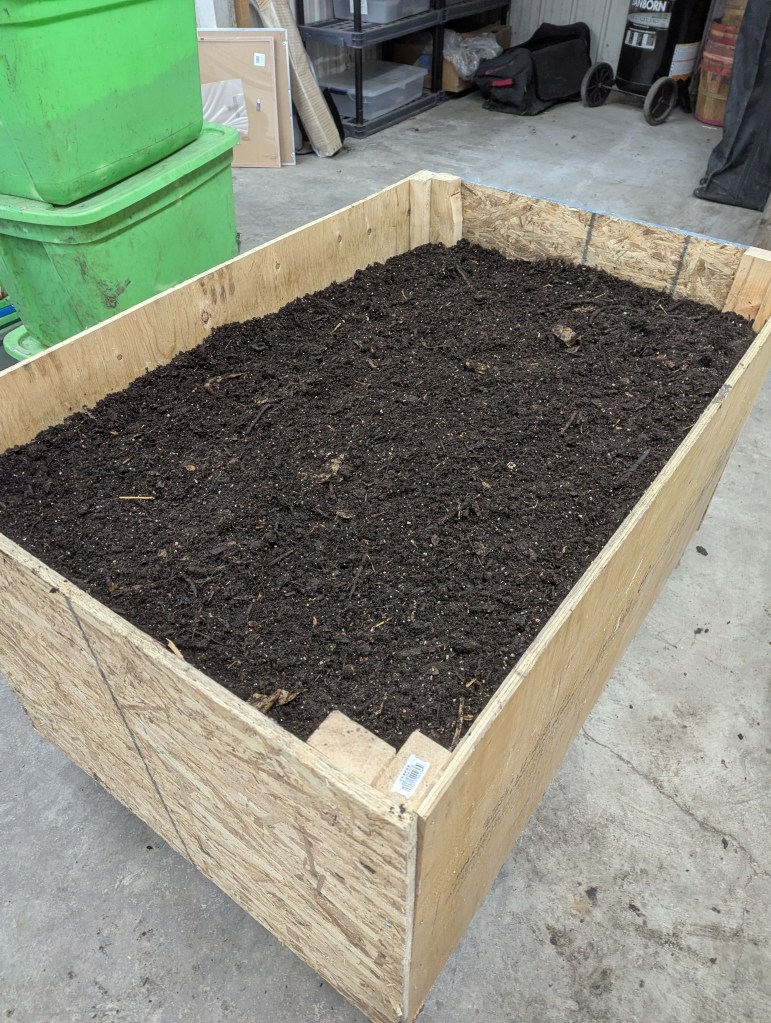
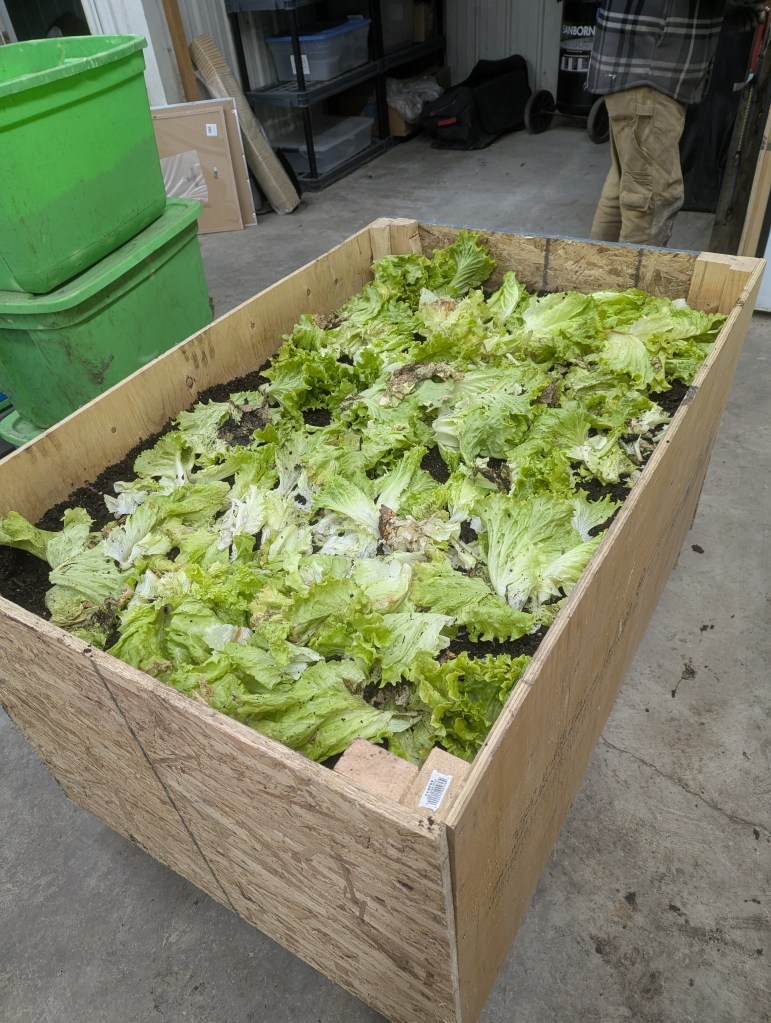
So to further that end and keep it going, I layer-caked some lettuce and leaves into the 600L bin, hoping to have more worms and keep it more biologically active. I think I made about 5 layers throughout the process.
And then more leaves:
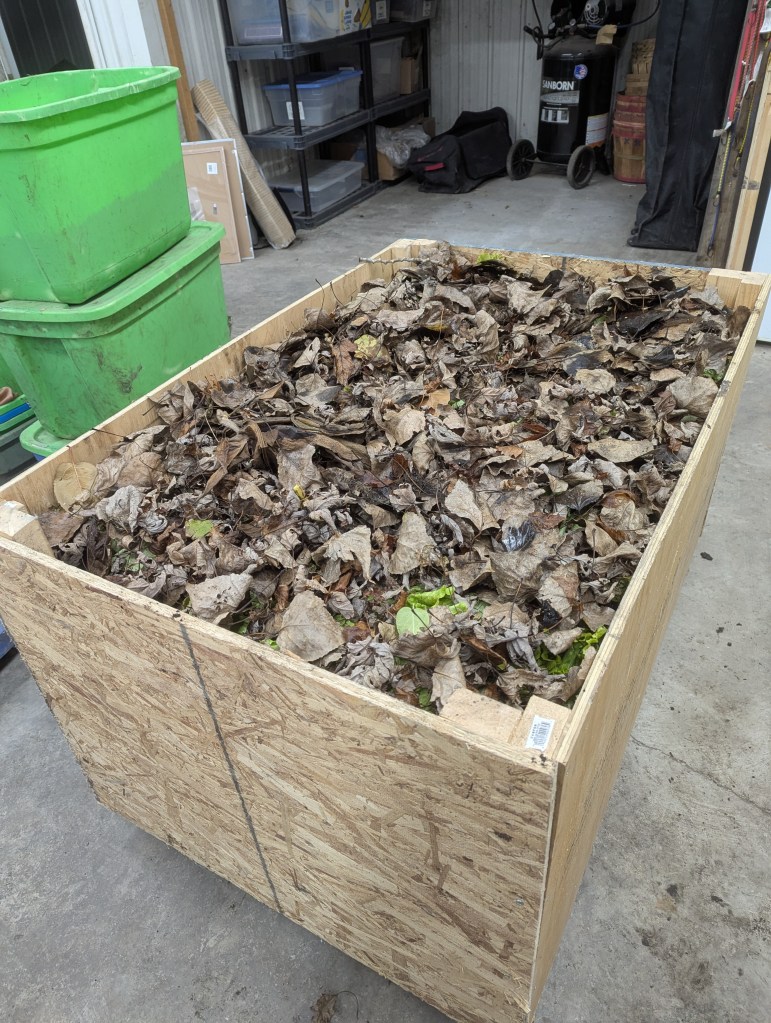
….and then more finished compost.
I don’t expect this all to break down over the winter, but it should be easy to sift out. Or…well, what do I know? Maybe it’ll all disappear by March. We’ll see what happens with this next spring.
Until then, we’ll let this process play out. Decomposition is a process that is fundamental to ecosystems around the world, and it needs time. There is no replacement or way to speed this process up. Biological process work as they work…and this one has been working for billions of years, taking organic material and reconfiguring it for new uses.
We can use that process as ecologically-minded or biologically-minded agriculturalists or horticulturalists to supplement our plant’s symbiotic relationships, health and immune system responses.
If you’re nerdy enough to have reached this point and you want more decomposition knowledge, and you don’t yet know about Whale Falls, there you go.
Graham
thanks for reading Complimentary Blueberry Juice
Home
About Graham
Graham is an ecologist-farmer from Canada working on educating about the wonders and beauty of the natural world, and how we can design biodiverse food production systems.

